Pork & kimchi dumplings (돼지 고기 & 김치 만두) is a famous Korean dumpling flavours filled with pork and kimchi (what else? hehe). I’ve been wanting to try my hands on making Korean dumpling ever since I came across this cute hat shape dumpling… 2 years ago. I kept putting it off because I’m lazy and because making dumplings seems hard work. No?
It wasn’t until few months back where I chanced upon a short cooking show at KBS World called Seri’s Star Kitchen. Seri (Myung Hyun-ji), a very talented Korean chef was teaching how to make pork & kimchi dumplings and it looks so easy! So I was adamant. No more holding back. A pity though I couldn’t find her show in YouTube. I jotted down what I remember Seri uses for the dumplings and the rest I refer to Maangchi and Korean Bapsang. Here’s my first mandu trial and it turned out well. I’m glad.
 1.jpg)
Steamed pork and kimchi dumplings. Not bad looking right?
 2.jpg)
Pan-fried pork and kimchi mandu. Gold mandu!!!
Let’s learn how to make and wrap dumplings aka mandu.
Place minced pork in a bowl and add seasoning (cooking wine, soy sauce, sesame oil and minced ginger). Mix well.
Squeeze out water from the tofu using a cheesecloth, about a handful each time. Make sure the tofu is dry and crumbly. I don’t have a cheesecloth so I’m using a paper towel. Later I uses my hand as the paper towel is not a good idea. Haha
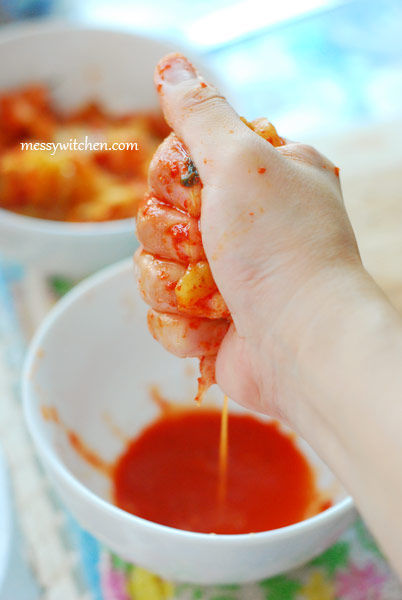
Next, squeeze out the juice from kimchi. Don’t discard the juice. Keep it for other recipes, e.g. kimchi jjigae, kimchi fried rice or kimchi bibimguksu.
Chop kimchi and place in the bowl.
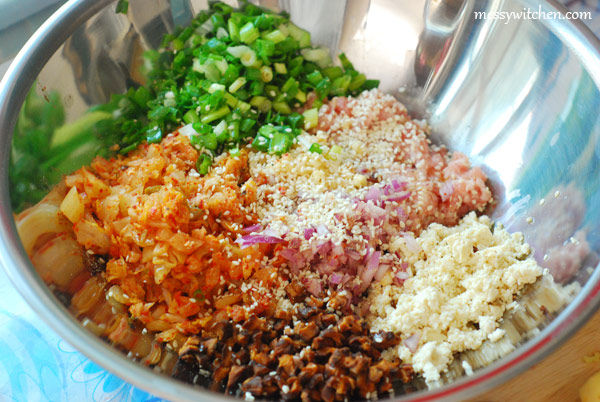
Chop soaked mushrooms, spring onions, minced garlic cloves and onions. Place all including an egg in the bowl. Then add roasted sesame seeds, sesame oil, salt (optional) and pepper to the bowl.
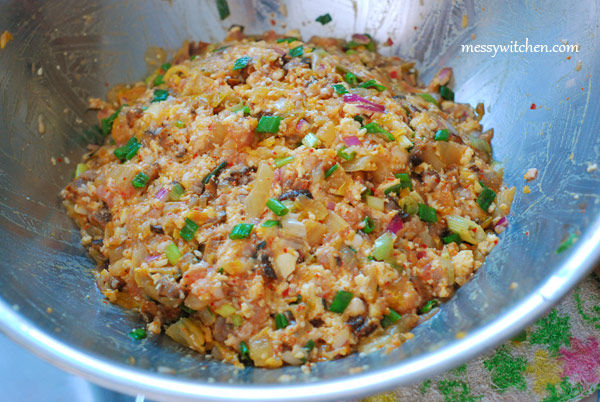
Mix all by hand.
Btw, I use store-bought dumpling wrappers.
Now it’s time to wrap the mandu. Before that, line a flat baking pan/large plate with cling wrap. This is to prevent mandu from sticking with the pan. Also make sure the mandu are not touching to each other when you’re arranging them on the baking pan/plate.
Let’s look at how to make half-moon mandu, pea pod mandu and hat shape mandu. Feel free to make any shapes you like. Personally I prefer pea pod shape mandu for pan-fried and hat shape mandu for steaming and soup (because this mandu can retain liquid due to its shape).
How To Wrap Half-Moon Shape Mandu:

Place a sheet of dumpling wrapper on your palm. Scoop a heaping teaspoon of filling onto the wrapper, slightly off center).
 with Water.jpg)
Use your fingertip to apply a little water to one edge of the wrapper. The water will act as a sealant.
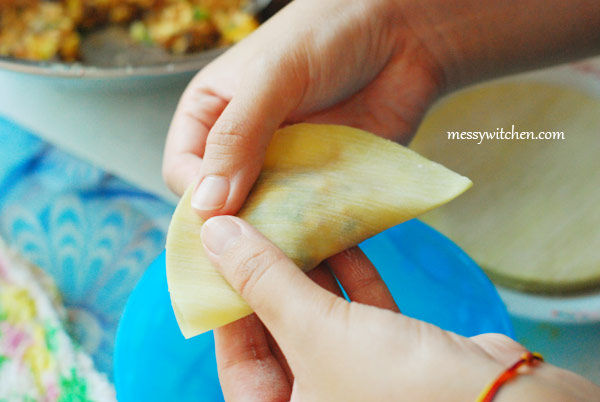
Fold over the wrapper and seal tightly while pushing the air out with your fingers. You get a half-moon shape mandu!
Half-Moon shape mandu are perfect for pan-fried, deep-fried and steaming. But because this shape is simple, it’s kinda boring looking. No?
How To Wrap Pea Pod Shape Mandu:
First follow the steps for making half-moon shape mandu.
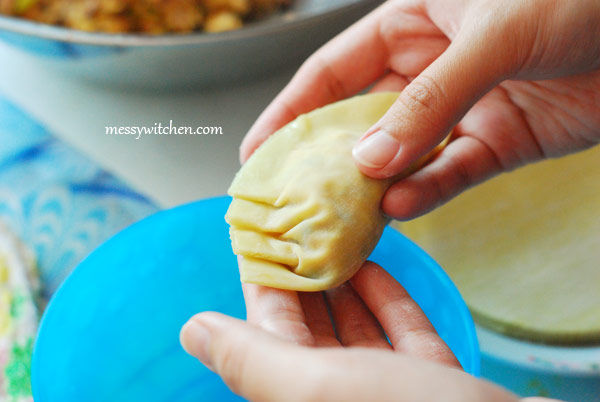
Apply a little water to the half-moon edge. Then carefully pleat the edge together.
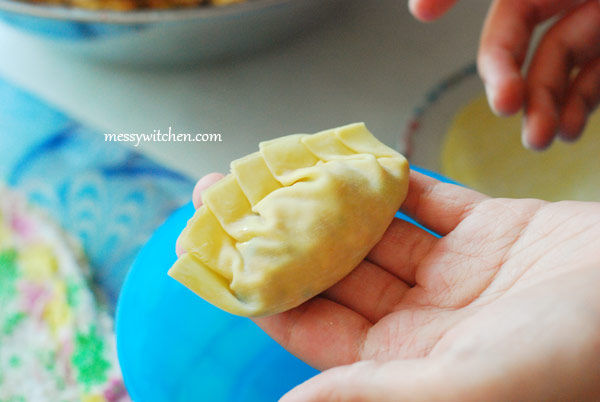
That’s it. Good for a novice. It took a few trials to make it ‘not bad’. Haha
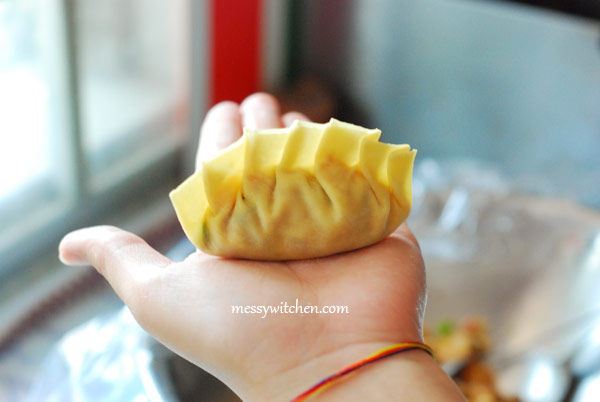
The mandu looks like a pea pod, right?
Pea pod shape mandu are perfect for pan-fried and steaming.
How To Wrap Hat Shape Mandu:
First follow the steps for making half-moon shape mandu.

Gently bring edges of wrapper together.
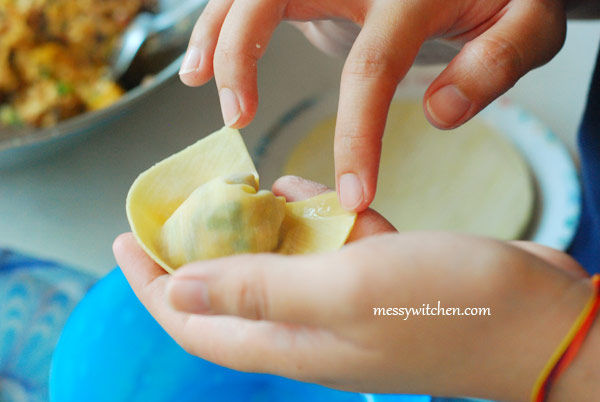
Wet one edge with water.
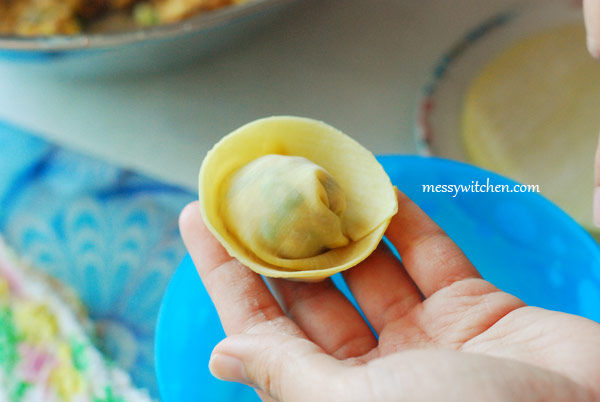
Seal the edges together.
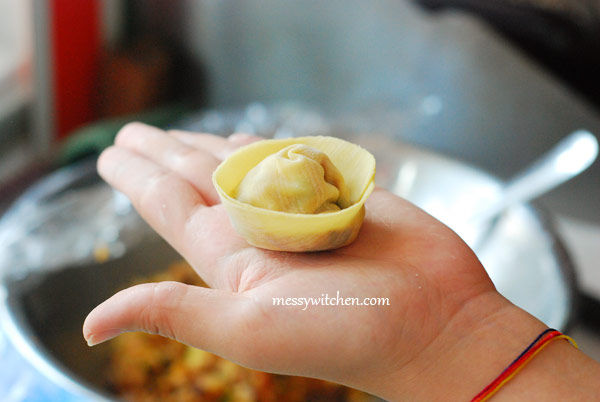
Cute hat shape mandu!
Hat shape mandu are perfect for steaming and soup. It’s my favorite mandu shape.

They look not bad right? Once the pan is full, you can line another cling wrap on top. Make sure they’re not touching each other.
Refer to the recipe below on how to pan-fried, steam and cook with soup with the mandu.
 3.jpg)
Steamed pork and kimchi dumplings. The edges of these steamed mandu are a bit hard. No idea why. They’re still delicious though.
 4.jpg)
Pan-fried pork and kimchi mandu. Turned out I like pan-fried better than steamed.
 5.jpg)
Yum-yum!
Pork & Kimchi Dumplings (돼지 고기 & 김치 만두)
Adapted from Maangchi, Korean Bapsang & KBS Seri’s Star Kitchen.
Yields 35 pieces
150g minced pork
300g chopped kimchi
1 tofu
3 Chinese mushrooms/Shiitake mushrooms, soaked and finely chopped
1 egg
2 chopped spring onions
2 garlic cloves, minced
1/2 onions, minced
1 tablespoon roasted sesame seeds
2 tablespoons sesame oil
1/4 teaspoon salt (optional since kimchi is salty)
1/2 teaspoon pepper
dumpling wrappers (store-bought)
a bowl of water
Seasoning for minced pork:
1/2 teaspoon cooking wine
1/2 teaspoon soy sauce
1/2 teaspoon sesame oil
1 teaspoon minced ginger
Method:
Make Mandu Filling:
1. Place minced pork in a bowl and add seasoning (cooking wine, soy sauce, sesame oil and minced ginger). Mix well.
2. Squeeze tofu to remove water by using a cheesecloth, about a handful each time. The tofu should be dry and crumbly after that. Place the crumbly tofu in the bowl. Because I don’t have cheesecloth, I used a kitchen towel and eventually ended up squeezing the tofu with my hand!
3. Squeeze out the juice from kimchi next. Then chop the kimchi and place in the bowl. Don’t discard the juice. Keep it for other recipes, e.g. kimchi jjigae, kimchi fried rice or kimchi bibimguksu.
4. Chop soaked mushrooms, spring onions, minced garlic cloves and onions. Place all including an egg in the bowl.
5. Add roasted sesame seeds, sesame oil, salt (optional) and pepper to the bowl.
6. Mix all by hand.
How To Wrap Mandu:
There are 4 types of mandu shape that I know of, one is the half-moon shape mandu, two is the pea pod shape mandu, third is the hat shape mandu and lastly the grab bag shape mandu (shape like a bag of gold). I’m going to show you how to wrap mandu into half-moon shape, pea pod and hat shape.
Before starting the wrapping process, line a flat baking pan/large plate with cling wrap. This is to prevent mandu from sticking with the pan. Once the pan is full of mandu, you can line another cling wrap on top. And also make sure the mandu are not touching each other.
How To Wrap Half-Moon Shape Mandu:
NOTE: This method also applies to the first part of making pea pod mandu and hat shape mandu
1. Place a sheet of dumpling wrapper on your palm.
2. Scoop a heaping teaspoon of filling onto the wrapper, slightly off center).
3. Use your fingertip to apply a little water to one edge of the wrapper. The water will act as a sealant.
4. Now fold over the wrapper and seal tightly while pushing the air out with your fingers. You get a half-moon shape mandu!
Half-Moon shape mandu are perfect for pan-fried, deep-fried and steaming.
How To Wrap Pea Pod Shape Mandu:
1. Follow steps 1 to 4 of how to wrap half-moon shape mandu.
2. Now apply a little water to the half-moon edge.
3. Carefully pleat the edge together. That’s it. Doesn’t it look like a pea pod?
Pea pod shape mandu are perfect for pan-fried and steaming.
How To Wrap Hat Shape Mandu:
1. Follow steps 1 to 4 of how to wrap half-moon shape mandu.
2. Gently bring edges of wrapper together.
3. Wet one edge with water. Seal the edges together. You get a cute hat shape mandu! This is my favorite mandu shape.
Hat shape mandu are perfect for steaming and soup.
Cooking Mandu:
Here are 3 methods for cooking mandu: pan-fried, steaming and soup.
For soup recipe, refer to my favorite: Mandu Doenjang Guk and Korean Rice Cakes Soup with Leeks & Mandu.
Pan-Fried
1. Place some cooking oil on a pan with medium heat.
2. Lower the heat once the pan is hot, place some mandu and cover the pan with lid to cook.
3. Turn over mandu few minutes later.
4. Add 2-3 tablespoons water in the pan and cover with lid again. Cook a few minutes more. It’s to make the mandu crispier if I’m not mistaken.
5. Cook a few more minutes with the mandu ‘standing’. Mandu is done when it’s golden brown. Serve warm.
You don’t need any dipping sauce for this as the mandu is good to eat on its own thanks to the kimchi inside.
Steaming
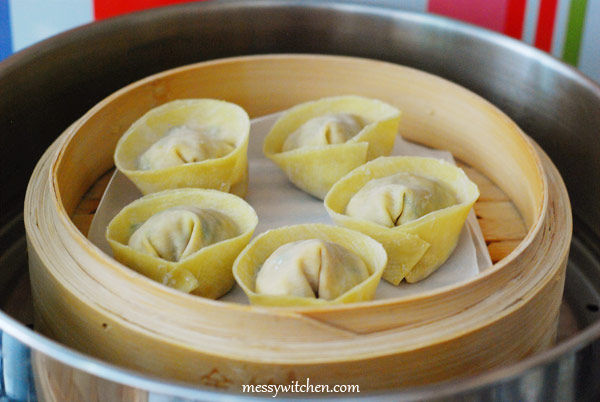
1. Place some mandu on a bamboo steamer/plate that is lined with cheesecloth, wet towel or paper. This is to prevent mandu from sticking.
2. Once the water is boiling in the steamer, place the bamboo steamer/plate in the steamer and steam for 10 minutes.
3. Serve warm.
If you have leftover mandu, you can freeze them.
1. Freeze mandu on a tray/plate for about an hour or more. Make sure they’re not touching each other.
2. Then you can freeze the mandu in different freezer bags according to their shapes.
3. To cook, you don’t need to thaw them. Just cook them a little longer than usual.


2 Comments
arghhh the round dumpling so kiut!
got delivery service ar XD
Yeah so so CUTE!
Hmmm… in future maybe? Haha