Tai yang bing (太陽餅) or sun cake is a delicious dessert originated from Taichung, Taiwan. It’s called what it’s called because the pastry look exactly like a sun. Since I tasted my first ever tai yang bing from Lavender Bakery, it has become my favorite. What I like about tai yang bing? Plenty. I like its flaky crust, its sweet filling and most probably because it gives me comfort. And this is exactly what this recipe I’m sharing echo.
This will also mark my last post for 2014. I hope you had a great 2014 and I will bring you more yummy recipes come 2015. Happy holidays and cheers!
 1.jpg)
Just looking at these tai yang bing make my mouth water! Haha
Let’s bake!
To make water dough:
Mix the maltose with warm water to dilute it. Then mix maltose+water, plain flour, sugar and shortening into a smooth dough. Divide dough into 10 equal parts.
To make oil dough:
Mix flour and shortening into a dough. Divide into 10 equal parts.
To make filling.
Again mix maltose with warm water. Then mix maltose+water, icing sugar, flour and butter to form a dough. Divide into 10 equal portions.
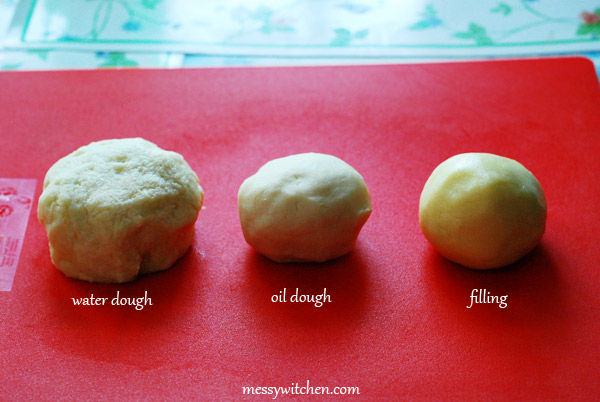
From left water dough, oil dough and filling.
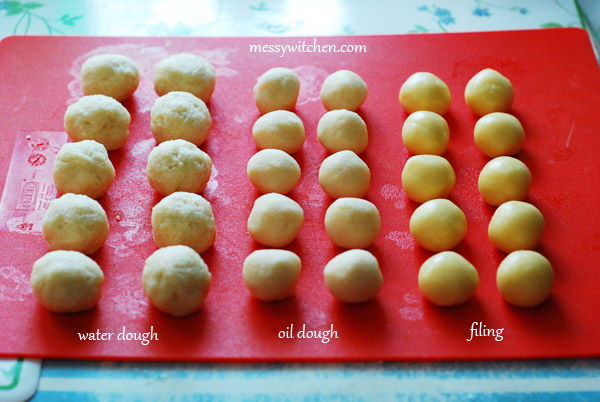
The three doughs are then divided into 10 equal portions. How do you do that? Simply weight the dough and then divide by 10. You then portion them by weighing one by one. A bit tedious but it’s a must.
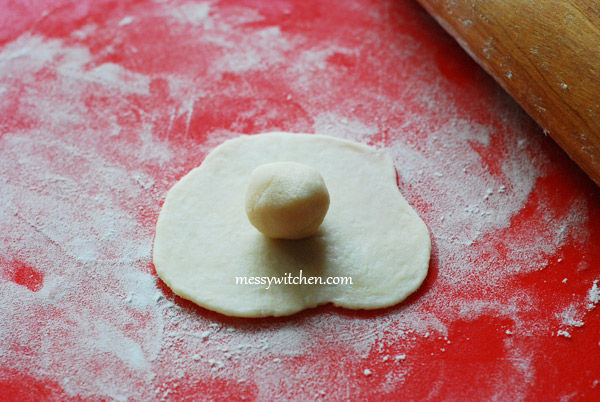
Now on a floured work surface, flatten a water dough with rolling pin. It must be wide enough to wrap the oil dough. Then place an oil dough in the center. Wrap the water dough with the oil dough in the middle. Seal the edges and form a smooth ball.
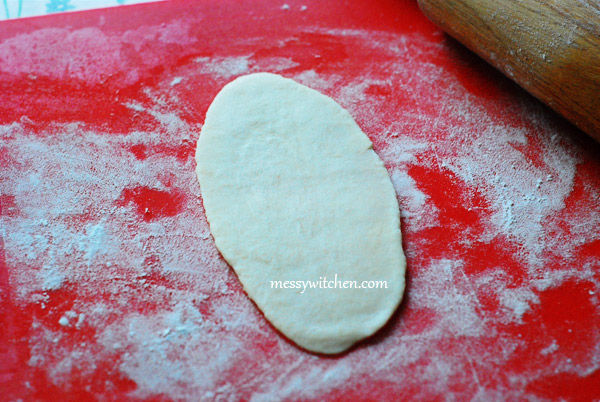
Roll the dough into rectangular shape.

Roll it up like Swiss roll.
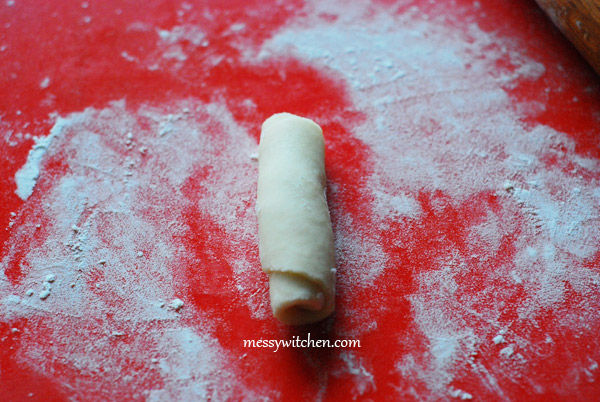
Then turn it 90o
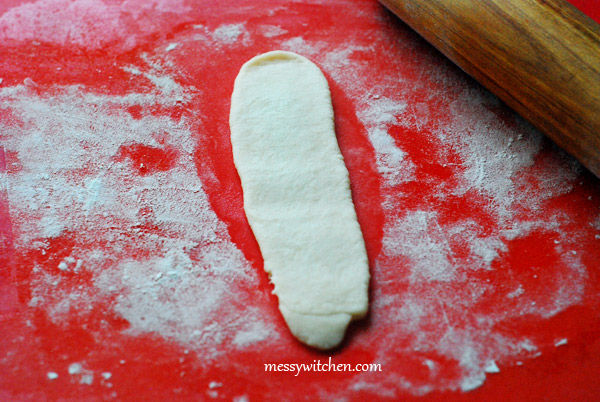
Now roll the dough into rectangular shape again.

Roll up like Swiss roll.

Next, place the roll into standing position.
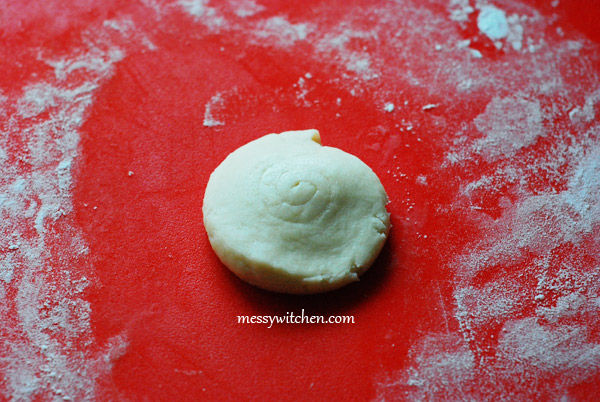
Flatten the dough with your hand.
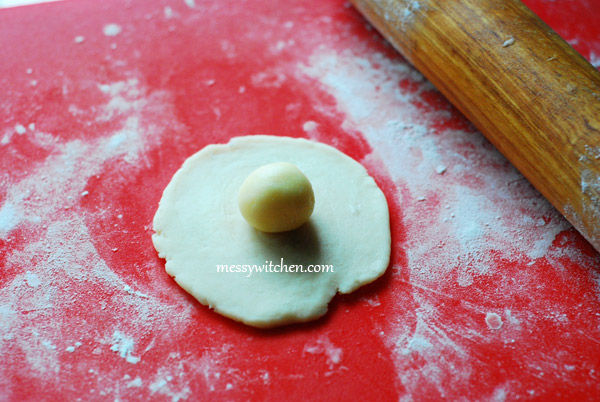
Now roll the dough into circular shape. It must be wide enough to wrap the filling. Place filling in the center and wrap the dough up. Seal the edges.
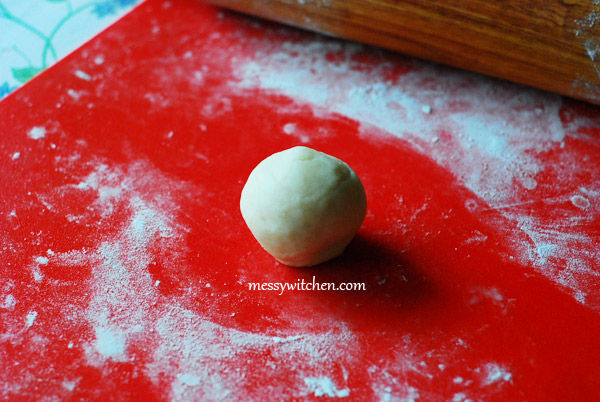
Place the sealed edge facing the work surface.

Lastly roll the dough into circular shape of about 7cm-8cm. Don’t make your tai yang bing too large because it’ll be too thin and the filling might ooze out during baking.
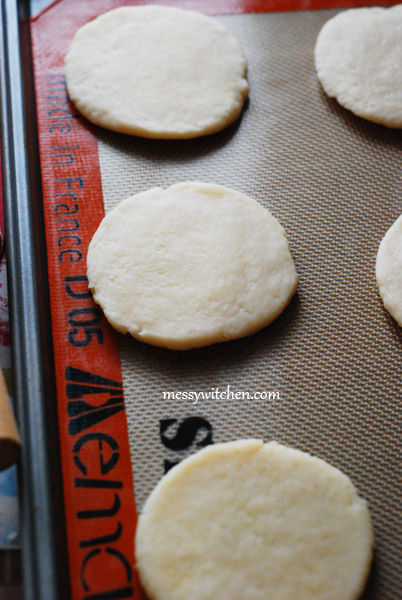
Place the pastry on a baking tray with lined baking paper or silicone mat. Repeat with the remaining 9 sets of doughs.
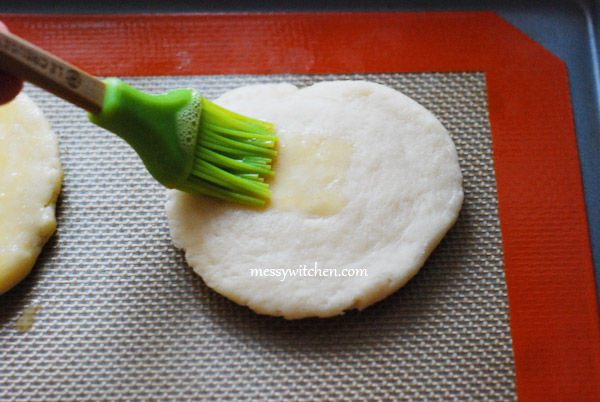
Brush egg wash on the surface of the pastry. Then bake in 200oC oven for 11 to 12 minutes or until golden brown.
 2.jpg)
Homemade tai yang bing!
 3.jpg)
Yummy! Yummy! Yummy!
太陽餅 Tai Yang Bing (Sun Cake)
Adapted from Irresistible Pastry by Alex Goh
Makes 10 pieces
Water Dough
110g plain flour
1/4 teaspoon maltose
15g sugar
45g shortening
50g warm water
Oil Dough
75g plain flour
45g shortening
Filling
80g icing sugar
20g maltose
25g plain flour
20g butter
1/2 tablespoon warm water
Egg Wash
1 egg + 1 teaspoon water, lightly beaten
Method:
For Water Dough:
1. Dilute maltose into warm water. Then mix all the ingredients to form a smooth dough.
2. Divide dough into 10 equal parts.
For Oil Dough:
1. Mix all ingredients to form a smooth paste. Then divide it into 10 equal parts.
For Filling:
1. Dilute maltose into warm water. Mix all ingredients to form a dough. Then divide it into 10 equal parts.
Making tai yang bing:
1. On a floured work surface, flatten the water dough and place an oil dough in the center.
2. Wrap the water dough with oil dough. Seal the edges and form a round smooth ball.
3. Roll the dough into rectangular shape. Then roll it up like Swiss roll. Turn it 90o
4. Again roll the dough into rectangular shape. Roll it up like Swiss roll.
5. Now put the roll into stand position. Flatten the dough with your hand.
6. Roll the dough into circular shape wide enough to wrap the filling.
7. Place the filling in the center, wrap the dough up and seal the edges.
8. Place the sealed edge facing the work surface.
9. Roll the dough into circular shape of about 7cm-8cm. Place on a baking tray lined with baking paper or silicone mat.
Note: Be careful not to roll the dough too thin or the filling will ooze out during baking.
10. Repeat steps 1 to 9 for the remaining 9 sets of doughs.
11. Brush egg wash onto the surface and bake in 200oC oven for 11 to 12 minutes or until golden brown.
Enjoy!


10 Comments
A wonderful recipe very well explained. It looks so good I am sure it tastes awesome too.
Hi Piyali, thank you. 🙂
Is the flour plain flour/all purpose flour? Thanks.
Hi Lena, yes plain flour. I’ve updated the recipe. 🙂 Thank you.
tried making it and it was a mess. lol. the water dough was too dry and kept opening up when i wrap the oil dough. the fillings leaked. have to try again. 😀
Good luck! 😉
Late reply here,
Do you have USA measurements? Cups/Tablespoons etc…?
Hi, No I don’t. It’s best to use weight measurement.
Thank you so much for the recipe! I adapted it to be vegan and it worked like a charm! (I used vegetable shortening instead of regular, and agave+almond milk for the egg wash). My doughs and filling were a bit wet, so I added more flour, but all in all I love the end result & the pictures REALLY helped 🙂
Hi Maddie, you’re most welcome. Glad the pictures helped. Do share your photo in Instagram if you have one and tag me. Would love to see your vegan tai yang bing. 🙂