I am fascinated with anything that has to do with salted duck egg because I heart this sinful and yet irresistible golden egg. Fried prawn with salted egg, fried crab with salted egg, fried pumpkin with salted egg and the list goes on… you name it I heart it. Lucky for me, the May-June issue of Flavors magazine featured a couple of recipes using salted duck egg (yipeeaiooo). The mag also includes 2 methods for preserving duck eggs.
I choose to cook lotus root with salted egg yolk since I think it’s a pretty interesting dish. Half way down the road (frying lotus root), I was getting ready to curse this mag because there’s no way I could obtain nice golden chips like in the recipe photo. Ahh but I did achieved a slightly ‘browned-golden’ chips after the finale. I am satisfied.
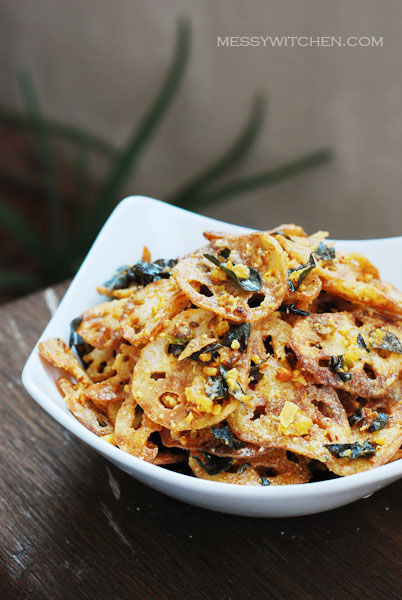
Hands off! This is mine. 😛
Let’s start!
First thing first, let’s prepare salted egg yolk. Refer to this guide on how to clean salted duck egg if you need help.
Place four salted egg yolks in a bowl and steam them for 7 minutes.
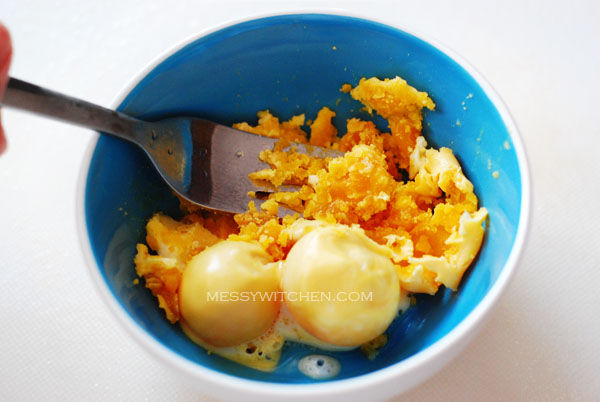
Mash yolk with a fork while it’s hot. Put them aside.
Next, let’s prepare curry leaves.

Besides butter, here are the other 3 ingredients needed to make kam heong dish. To quickly pluck curry leaves, place fingers at the end of the branch and swipe fingers along it. Remember to clean them beforehand.
The word ‘kam heong’ means ‘golden fragrance’ in Chinese and perfectly describe this dish of golden salted egg yolks and fragrant curry leaves, butter, garlic and chilies. ~from Flavours magazine
Now in a saucepan, add water and rice vinegar. Bring it to boil. While the saucepan is heating up, let’s prepare lotus root.
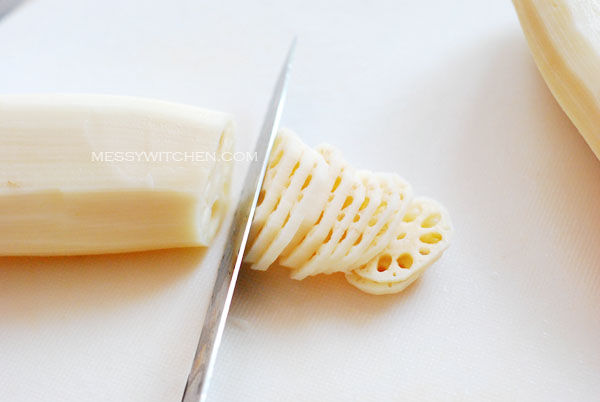
First, chop off both ends of lotus root. Next, peel the lotus root skin. Clean lotus root under running water. Now slice lotus root thinly (~about 2-3mm).
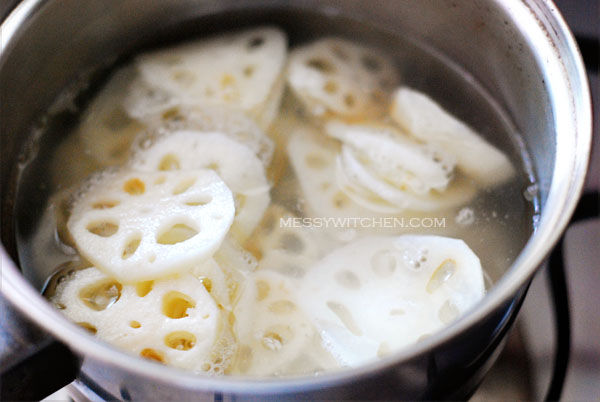
Once water+vinegar solution is boiling, blanch lotus root slices for 5 minutes.
Note: Reason for adding rice vinegar to lotus root is to prevent browning.
Since I have to 2 lotus roots to make up the 500g, I slice the first lotus root and while blanching it, I proceed with slicing the second lotus root. This proof to be time-saving. And also the water+vinegar solution is just enough for half of it. So it’s a win-win situation.
Use a strainer to collect the blanched lotus root slices.
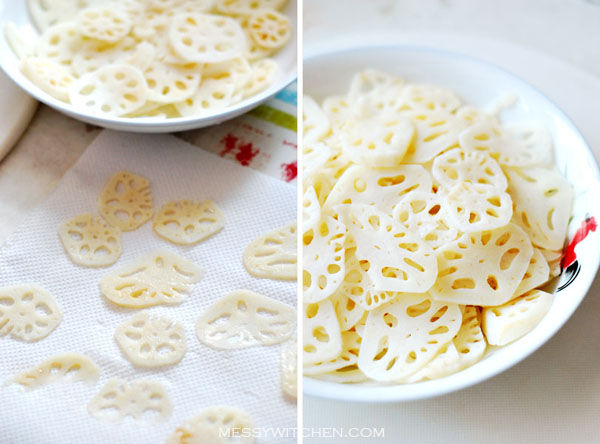
Now pat ’em dry with kitchen towel. Hard work here. The slices are a little gummy/sticky. Also please be careful while handling them because they are fragile after blanching.
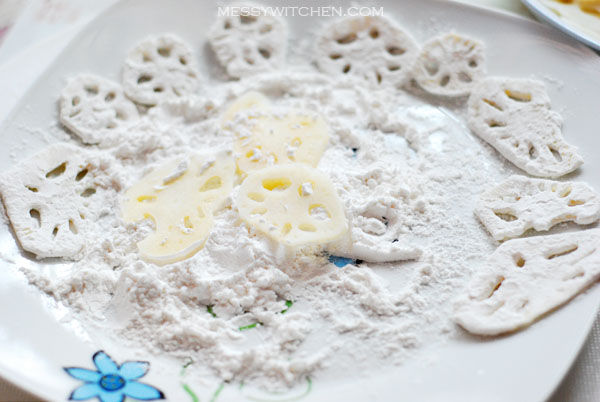
Next coat lotus root slices with tapioca flour.
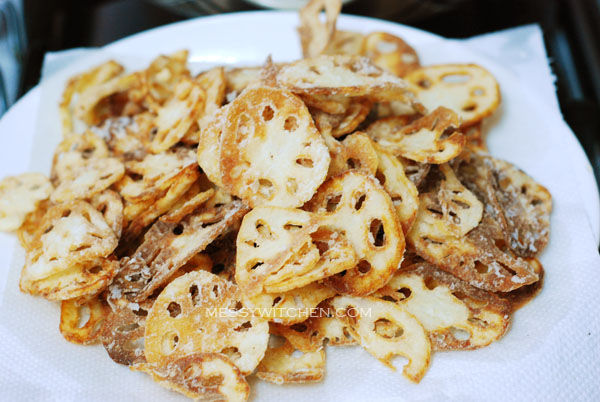
Deep fry them in hot oil until golden brown. Ohh this is the part where you have to be careful BECAUSE you will start munching ’em! Hehehe
In a wok over medium heat, add oil and butter. Then add garlic, chilies and curry leaves and stir-fry until fragrant. Lastly add lotus root chips, salted egg, sugar and salt. Mix well.
No photos here as I need to act really fast!
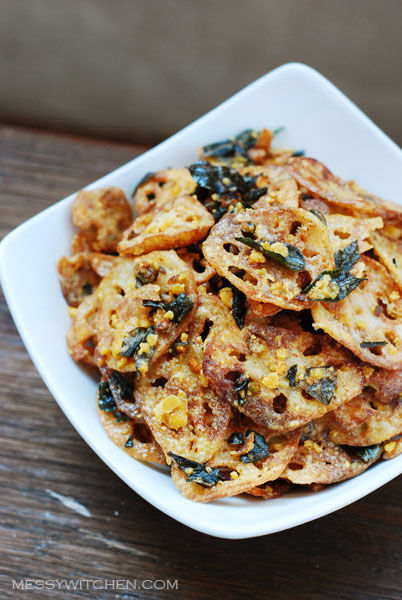
Lovely, crispy, fragrant and a lil’ spicy… got (ada) OOMPH!!!
My parents said ho chiak (delicious).
Make sure you eat the chips together with curry leaves and chili.
Add more bird-eye chilies if you’re a spicy person.
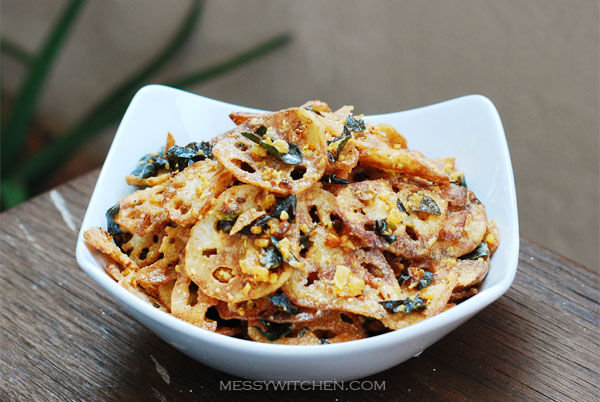
This dish is a perfect snack and side dish for all occasion. Try it.
Kam Heong Crispy Lotus Root with Salted Egg Yolk
Adapted from Flavours magazine (May-June 2011)
Serves 2-3
Lotus root chips
500ml water
4 tablespoons rice vinegar
400g lotus root, peeled and thinly sliced (I use 500g lotus root)
tapioca flour to dust
vegetable oil for deep frying
1 tablespoon vegetable oil
40g butter
2 cloves garlic, chopped
10 bird-eye chilies, chopped
15g curry leaves, cleaned (I use 10g leaves)
4 salted egg yolks, steamed for 7 minutes and mashed while hot
1 teaspoon sugar
1/4 teaspoon fine sea salt
Method:
Prepare lotus root chips:
1. In a large saucepan, bring water and vinegar to boil. Blanch lotus root slices for about 5 minutes. Drain it and pat dry them with kitchen towels.
2. Cover lotus root with tapioca flour. and shake off the excess. Deep fry them in hot oil until golden brown.
Finishing touch:
1. Over medium heat, add oil and butter in a wok.
2. Stir-fry garlic, chilies and curry leaves until fragrant.
3. Add lotus root chips, salted egg yolks, sugar and salt. Mix them so that the lotus root chips are coated well.
Happy cooking!


20 Comments
omg looks really good…
Wait till you taste it. 🙂
Seems a lot of work but the end result looks great!
Drying lotus root slices took quite some times. Other than that it’s pretty fast.
u surely take good shots throughout the preparation of the dish.. nice 🙂
I still have tonnes to learn for taking good pictures. It was hard work snapping and cooking at the same time.
It’s so easy to follow your cooking steps. I’m inspired each time I see a new recipe from you. Keep up the great work.
Hey thanks. Do you cook?
Its lovely and lotus root is so healthy, contains so much fiber and what more with all the other ingredients added inside.
Yeah beautiful components join together into a yummylicious dish. 🙂
Ow Amy! You are a truly awesome cook!
I knew it. Stop hiding! 😉
If you think you aren’t, you definitely have the ‘touch’ and the ‘talent’. You simplicity to cooking things are divine.
Definitely enticed and inspired by the curry leaves, chili padi (cabe rawit), and garlic photo. I think when I get back to Jakarta, I should attempt to do salted duck egg a little fun.
Me not awesome unfortunately. Just following recipe lo. 😛
Unlike you who is a SUPER AWESOME cook!
Can’t wait to see what you’re going to do with the salted duck egg.
Hey cabe rawit is a cute name.
This sounds fantastic! I love lotus root and salted egg yolk. Can’t go wrong with this dish!
Hi, Thanks for dropping by. Do try it if you have a chance.
Beautiful! And the flavors sound very intriguing :).
Do try it ya. My mom is asking me to cook this dish again. 🙂
Oh yum.. Send some over pleaseeeeeee 🙂
Hehe sudah habis. Couldn’t stop snacking at it.
Hi, may I know if this can be kept in an airtight container for long?
Hi Elena, I’m not sure as we usually finish this dish on the day it is cooked. But I doubt it can be kept long since ingredients like salted egg, garlic, chili and curry leaves will deteriorate (they are stir-fry). Best to make it on the day itself. You can try keeping for 2-4 days and see how but it won’t be as good as day 1 I think.